Have you ever noticed how kids get extra excited about learning when it ties into real-world events? With all the amazing space happenings right now, I knew this was the perfect time to bring the stars into my classroom—literally!
My third graders have been immersed in outer space, reading books, exploring planets, and learning about the night sky. But after a week of deep learning, I wanted to break things up with a hands-on project that would keep their excitement going. This DIY Constellation Project was the perfect fit! It’s simple, engaging, and works in so many settings—classrooms, homeschools, and even as a fun at-home activity to pair with a book or science lesson.
Let me walk you through how we did it, step by step. You’ll love how easy it is to set up, and your kids will love how it brings constellations to life! ✨
Watch our constellation project come to life! ✨ See how we turned pinholes into glowing star patterns and brought the night sky into our classroom.
Step 1: Choosing & Prepping the Constellations
To start, I printed constellation templates on half sheets of paper so students could pick one that interested them. If you’re doing this at home or in a homeschool setting, you can easily find free constellation printables online or let kids create their own patterns! Or click here for the ones I used (pictured below).

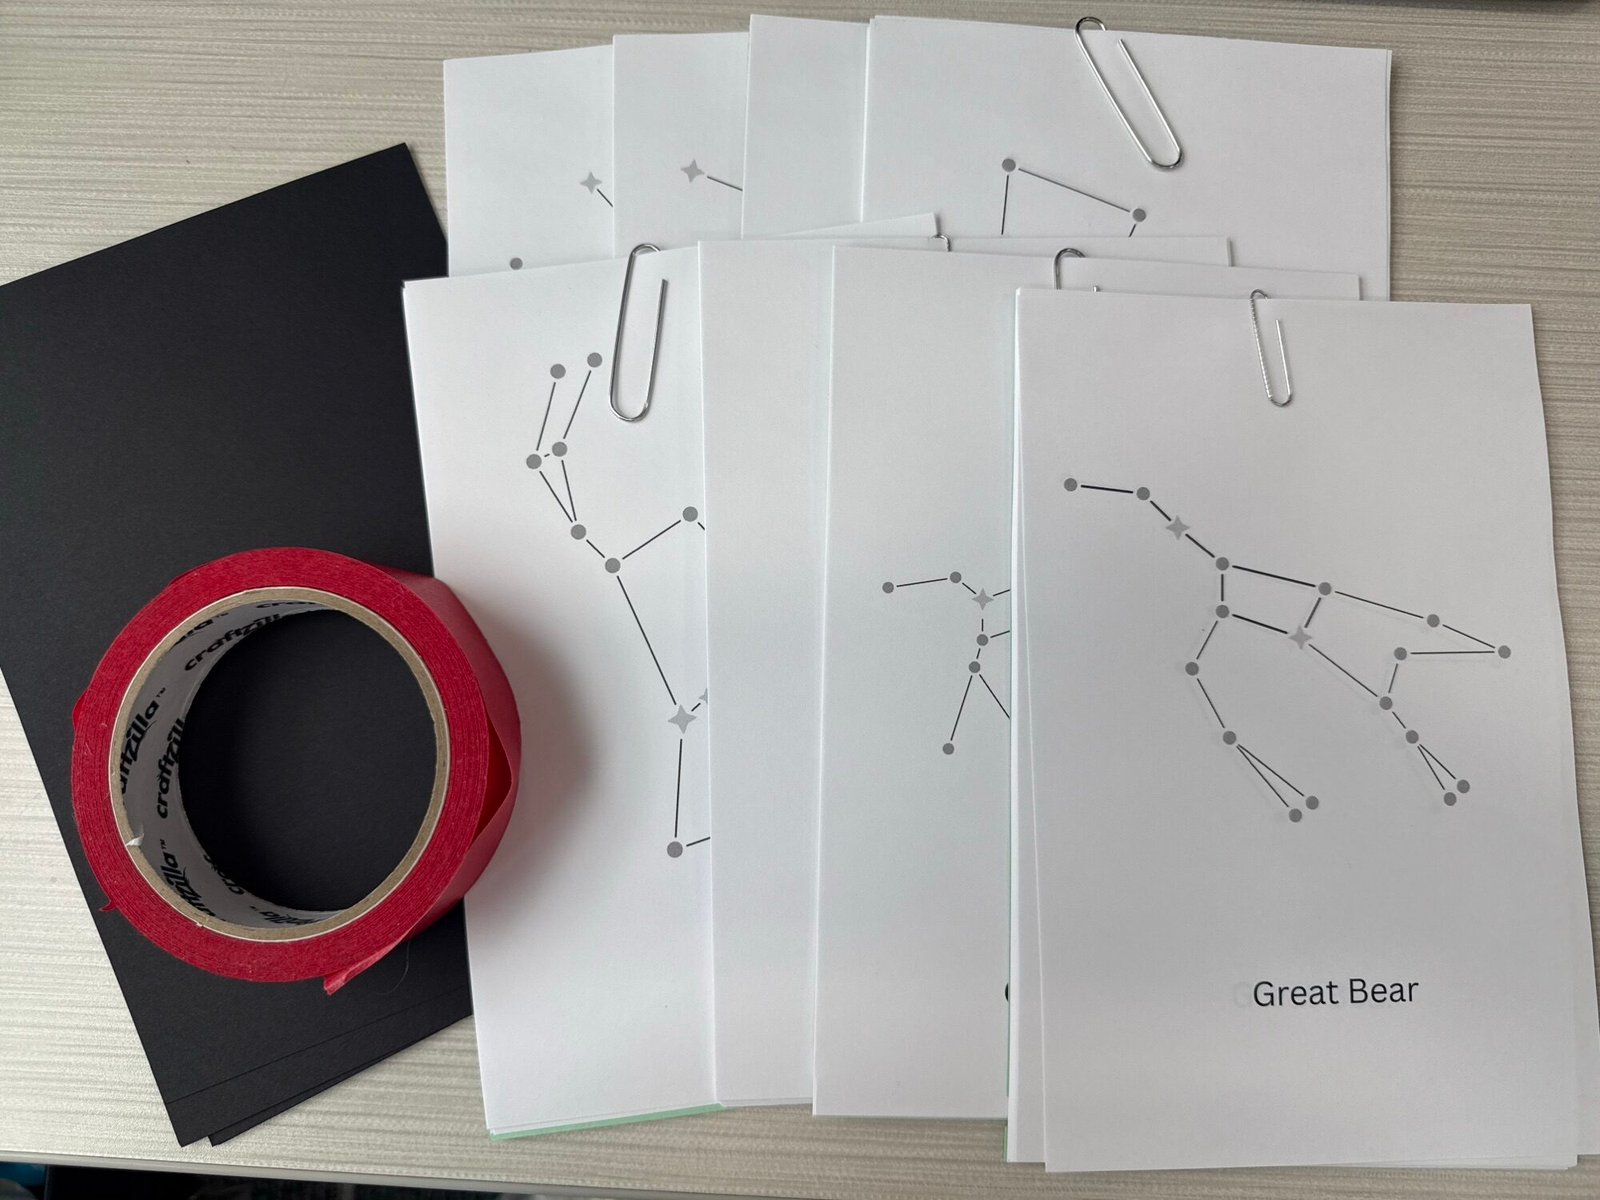
We used black construction paper as the background to mimic the night sky. To keep the templates in place, we used painter’s tape (trust me, don’t use regular tape—it peels the paper when they remove it!).

Step 2: Poking Out the Stars
Next came the fun part—poking out the stars!
I handed each student a push pin (cue the excitement—anytime kids get to use “real” tools, engagement skyrockets). They carefully poked holes through each star on their template while working on the carpet to prevent damage to desksand to make it easier to pierce the paper. I used the classic pins so kids could easily grip them and their fingers wouldn’t slip.
This part was actually oddly relaxing—kids were completely focused, and it was a great fine motor activity. Plus, it gave them a chance to see just how the stars connect to form recognizable patterns in the sky. I had them “wiggle” the push pin to make the hold a bit larger to allow more light to pass through. On the constellation templates I used, it shows which stars are largest so some kids poked multiple holes in those.
Step 3: Connecting the Dots
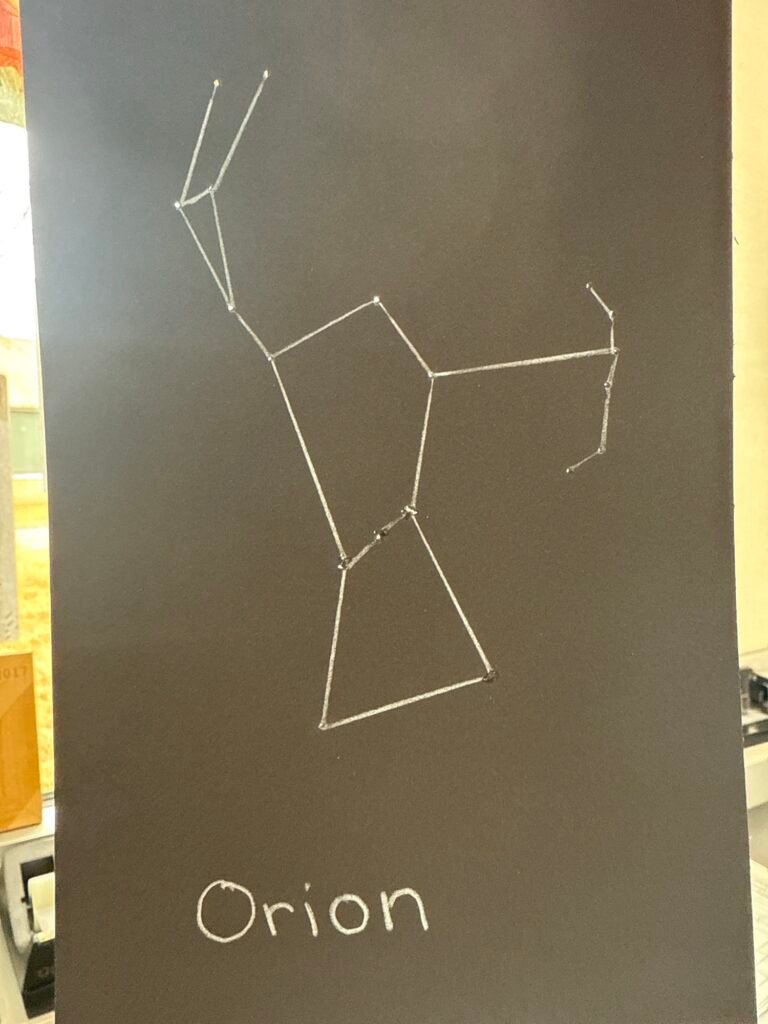
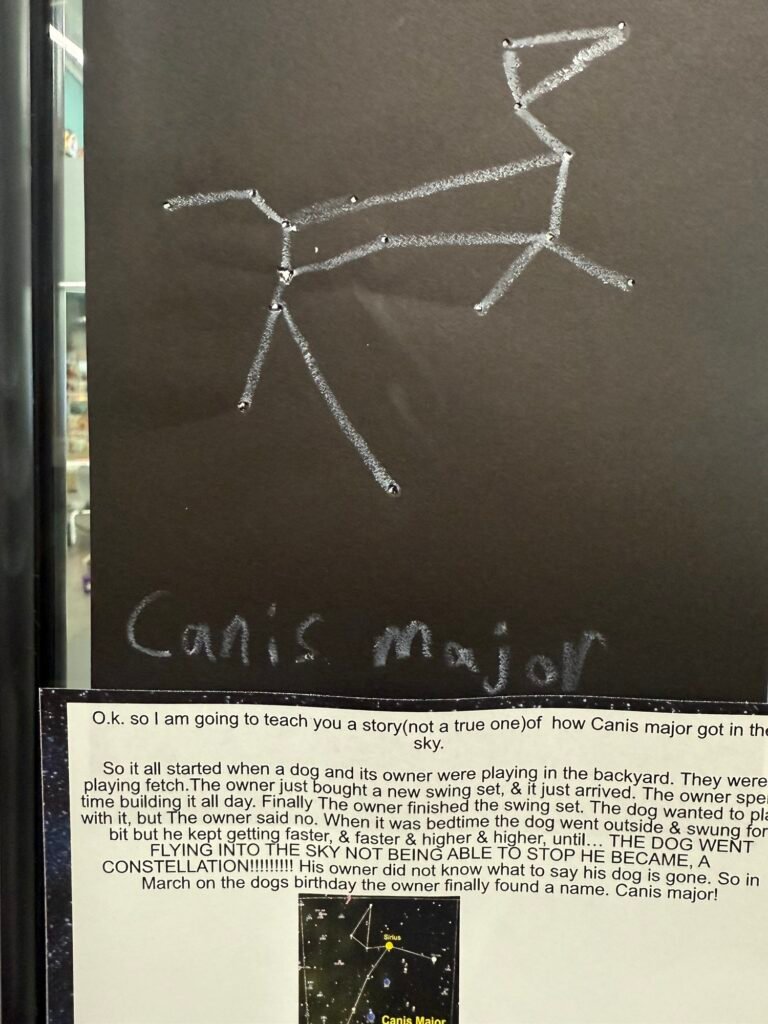
Once their constellations were punched out, we carefully removed the template. Then, using rulers and white crayons or colored pencils, students connected the dots between the pinholes to form a clear constellation pattern.
At this point, they could finally see the shape of their constellation, and it was so fun to watch their faces light up as they realized how the stars come together to form pictures in the night sky!
Step 4: Research & Writing
With their constellations complete, it was time to dive into research! We used Britannica Kids and Epic! to learn about the mythology and science behind their chosen constellation. Of course, you can use any of your preferred research sites. Then, students had a choice:
- Write a creative story about their constellation (perfect for imaginative writing).
- Write an informational paragraph explaining its history and significance.
To make this process smoother, I created a Google Slides template (click the link to make your own copy), where each student could edit their assigned slide number (matching their classroom number). This kept things organized and easy to manage.
To support their writing, I included example fiction and nonfiction samples on the last slide, using Orion as my model. It helped them understand both styles before diving into their own work.
Step 5: Bringing It All Together
Once students finished their slides, I printed them (two slides per page) and attached them to their constellation art. Then came the final, magical step—I taped their projects to the windows, allowing the sunlight to shine through the pinholes.
The effect? A beautiful classroom display that looked just like a night sky! It was like having our own mini planetarium, and the kids were so proud of their work.

Why This Activity Works So Well
This project was such a fun and meaningful way to break up our space unit, and the kids absolutely loved it. Not only did they get to be hands-on, but they also:
✔ Practiced fine motor skills while poking out their constellations.
✔ Reinforced science concepts through research.
✔ Tied in ELA skills with creative and informational writing.
✔ Got to show off their work in a unique display that made them proud.
If you’re looking for a simple, engaging space activity, this is one I highly recommend! Whether you do it at home, as part of a read-aloud extension, or within a science lesson, it’s sure to be a hit.
Try It Yourself!
Want to try this project with your students or kids? Here’s what you’ll need:
- Black construction paper
- Constellation templates (printed on half sheets)
- Push pins (for poking out the stars) *Make sure to use this type so their fingers don’t slip.*
- Rulers and white crayons or colored pencils (for connecting the stars)
- Britannica Kids or Epic! (for research)
- Google Slides template (click to make your own copy) for writing & reflection
I’d love to hear if you try this with your students! Drop a comment below and let me know how it goes. 🚀✨
Make sure to check out my Subscriber Freebies page for other awesome resources!


Leave a Reply